So, like me you got the PST but it's not enough and you know .001 zilch about optics?
The following is a condensate of
SolarChatForum that is dumbed down enough to make a PST mod easy.
I had my sights on a mod 2, meaning replacing the back with a good focuser and the front with more powerful optic but I don't understand enough about optic so I want to start safe and cheap. This more humble blog is about a mod 0.5: replacing the back with a good focuser that doesn't wobble around, something with enough back focus (focus plane range) that you can use any binoviewers.
First you disassemble your PST.

to do that you unscrew the golden tube

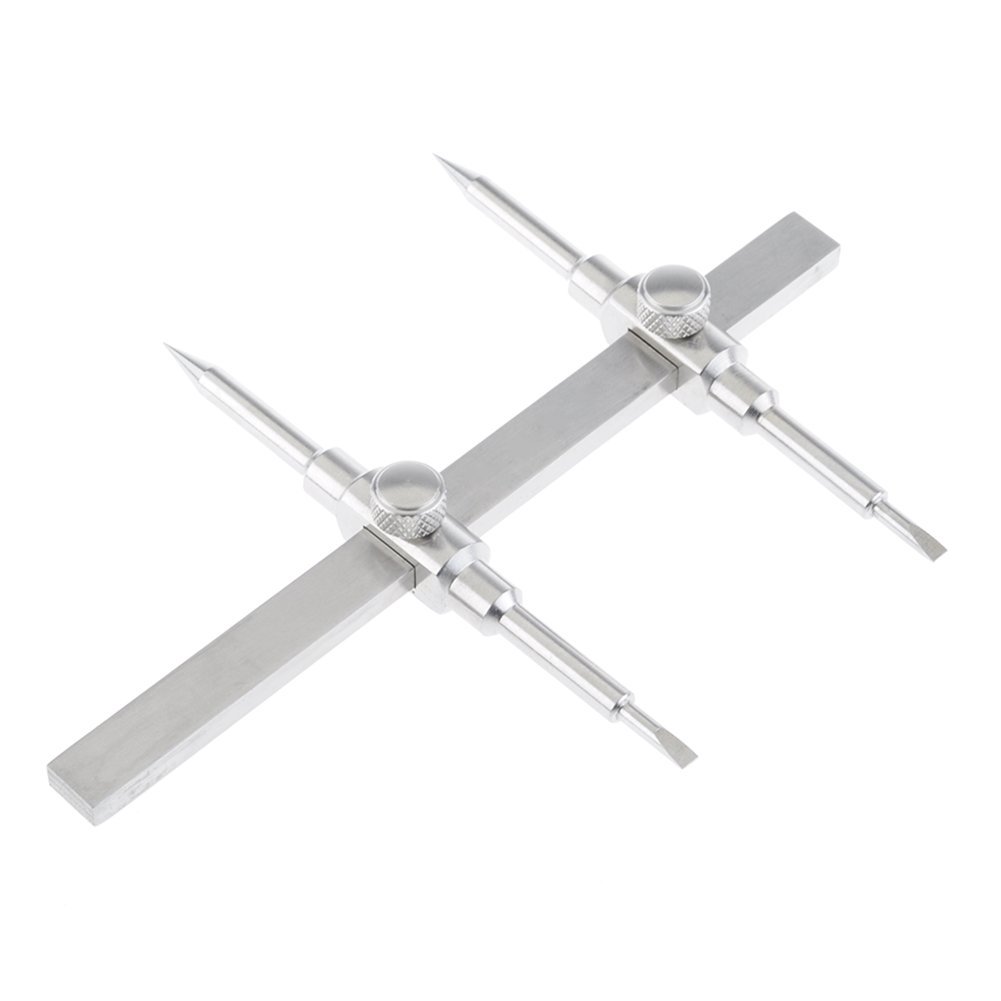
and with
this thing
you unscrew the corrector lens in front of the etalon

tada now the etalon is ready to be unscrewed


push hard


This is your etalon. Étalon is a French word which means standard of measurement, and also stallion.
If you're in a mood to disassemble everything you can unscrew the eyepiece holder, it won't be used but why not. (EDIT: this part is essential)

the tiny one at the bottom of the eyepiece holder is purple, maybe a UV filter?
Then we get the one that's attached to the black box, it's glued in so it'll take a bit more work.


ITF stands for Induced Transmission Filter and it's a bandpass for H-alpha 656nm. Acording to
this site, this tiny element costs $75!
I don't know why there is another H-a bandpass after the etalon.

These shiny lenses protect your eyeballs from blindness, give them a hug.
Now onto the last bit which is glued.

Notice the blue golden color of the prism, I think it's treated to filter the beam. Since we're not using it, are we risking our eyesight?
Heat it up the glue with a heatgun

wrap the bit with paper

clamp and twist


put the ITF+UV assembly back together,it will go to the end of the back.

then fit
this SCT nosepiece to the back of the etalon
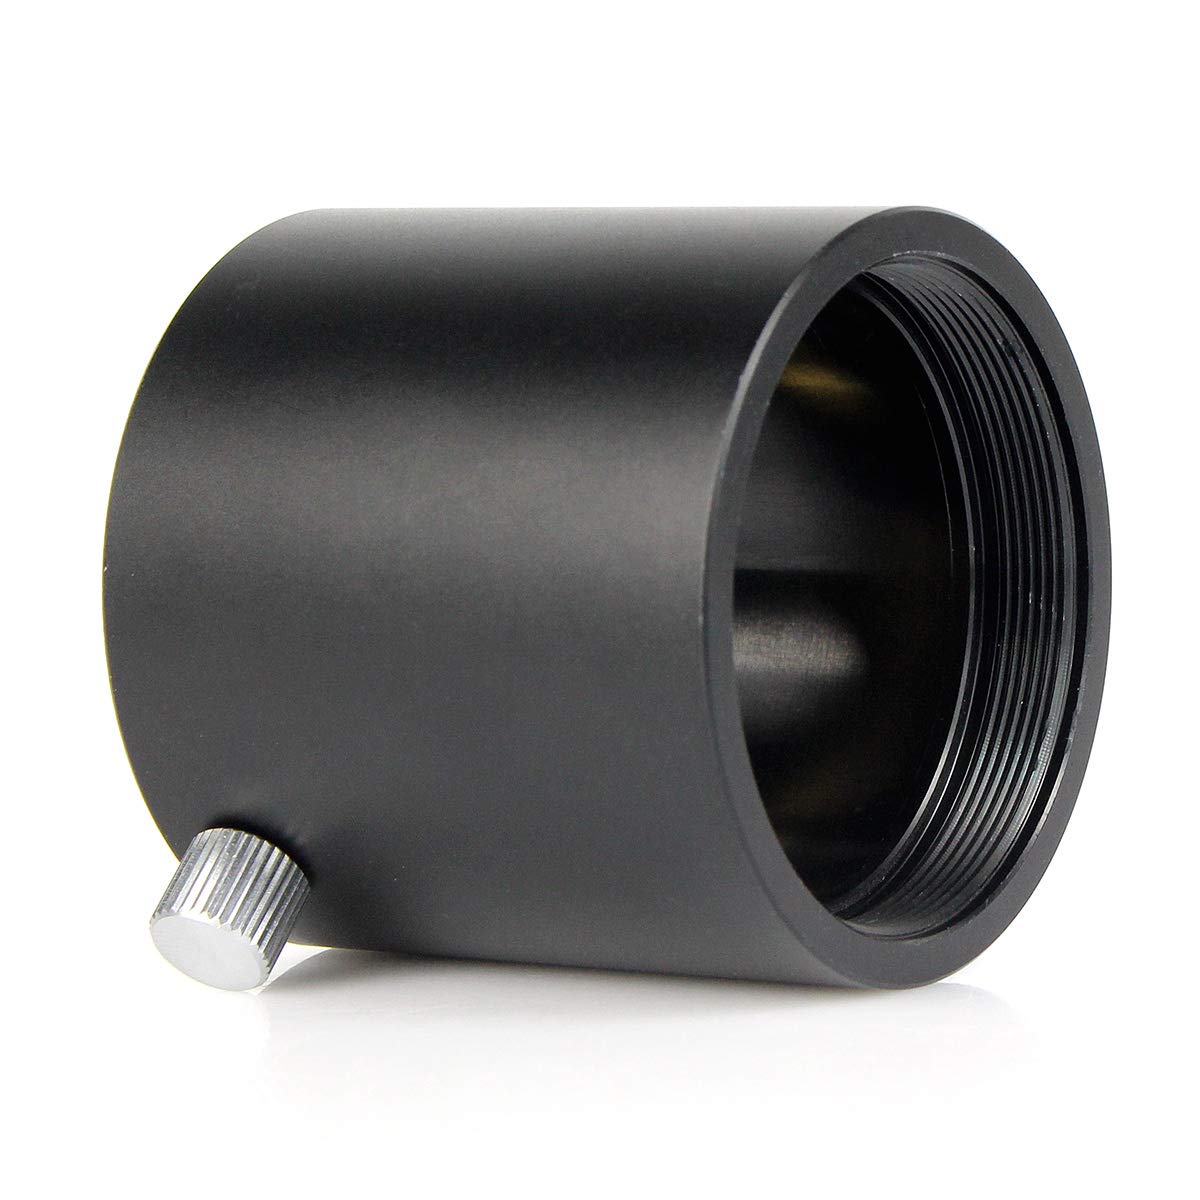
the M48x.75 female fits perfectly
Then add a few other bits to recreate the
200mm back, here I'm experimenting with 1.25mm 2x barlow then a 1.25mm helical focuser.

 Now why do we have to put 200mm of back behind the etalon?
The PST is a telescope with a focal length of 400mm. Focal length means distance behind the lense where the beams converges into a focused image. It's commonly represented as lines intersecting (blue in the diagram). The etalon is 200mm behind the front, it counts as 0mm towards the beam travel to the focal plane so there is 200mm more to go.
Why does it count as 0mm? The Fabry-Perot etalon needs beams that are parallel to do its precise boucy light thing but the front lense converges the rays into a cone. To correct that, the etalon is flanked by two plano lenses (yellow in the diagram). The plano concave at the front turns convergent beams into parallel beams to feed the etalon and the plano convex lens behind the etalon turns the now-filtered parallel beams back into convergent beam.
Now why do we have to put 200mm of back behind the etalon?
The PST is a telescope with a focal length of 400mm. Focal length means distance behind the lense where the beams converges into a focused image. It's commonly represented as lines intersecting (blue in the diagram). The etalon is 200mm behind the front, it counts as 0mm towards the beam travel to the focal plane so there is 200mm more to go.
Why does it count as 0mm? The Fabry-Perot etalon needs beams that are parallel to do its precise boucy light thing but the front lense converges the rays into a cone. To correct that, the etalon is flanked by two plano lenses (yellow in the diagram). The plano concave at the front turns convergent beams into parallel beams to feed the etalon and the plano convex lens behind the etalon turns the now-filtered parallel beams back into convergent beam.
what's missing now is the adapter to fit the end of the helical focuser M42 male to the ITF assembly's M32 male.
The simplest solution was found by Marty in SolarChatForum, it is to unscrew the eyepiece holder of a diagonal and replace it with the stock ITF assembly.
And here is the result.

If there is sun tomorrow I shall test it.
The sun was up, I placed a binoviewer in the focuser and put my eyes in it.
I could feel something tingly inside the eyeball so I stopped and re assembled the PST stock, looked again, no tingly.
The brightness was the same so my guess is that the pentaprism inside the black box of the stock PST reduces infrared by a lot.
Needless to say I took the discussions about filtering IR and UV VERY VERY seriously.
After much reading people who have been doing this or know the science, I came to a
temporary conclusion that the ideal mix of filter is a.
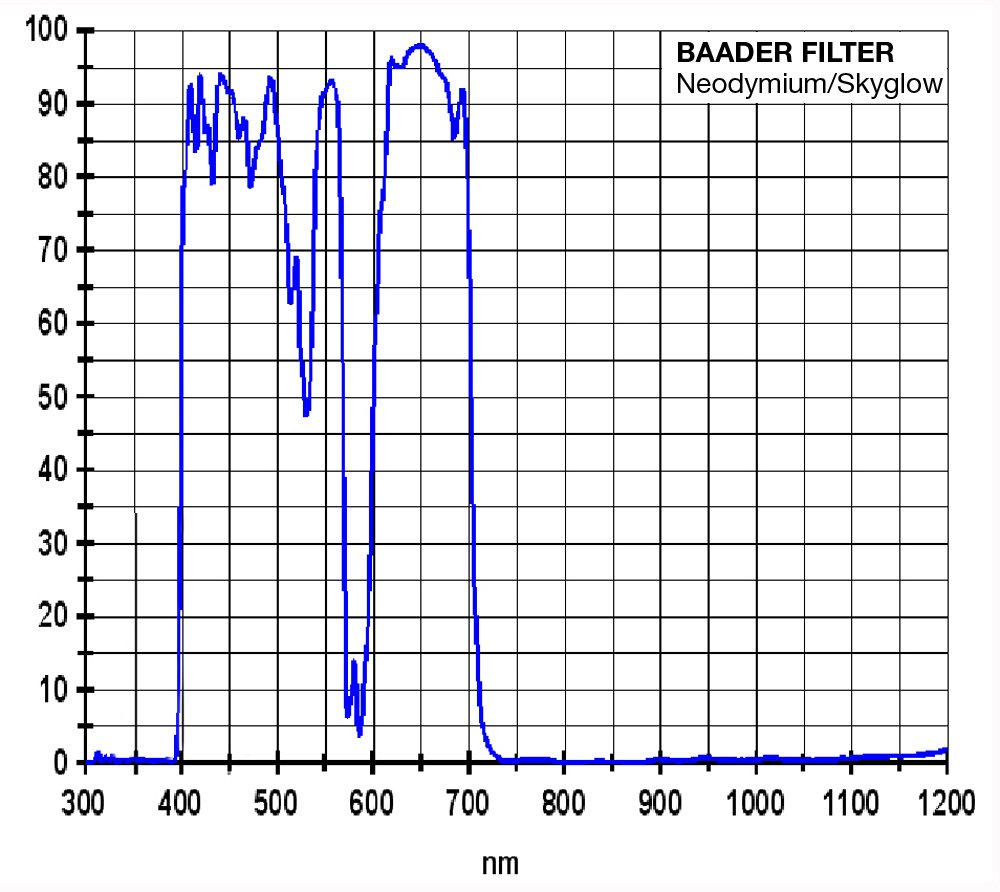
Baader
moon and skyglow or a 35nm CCD h-alpha filter to reject IR and UV around the visual spectrum
BelOptik KG3 to reflect IR beyond 1200nm, it is good in the far IR like a KG3 and
Here are the graphs, you can see they are complementary in the far IR and it is coated to reflect IR thus preventing filter from cracking under heat expansion.
Here is a demonstration

Alternate to a Beloptik is a cheap KG3 and a reflective near IR but I'm sure the price will be the same.
Since these filters are glass only, I must find a way to hold them in a 2" tube.
EPILOGUE
I returned the PST, got a Quark and an Orion 120mm and it was EPIC!


